
Introduction
You might have heard some of the buzz around Webpack in the last few months. If you’re anything like me, you probably took one look at it, decided not to bother with its hipster black magic, and went back to using Grunt or Gulp for all of your front-end tasks. This is especially true if you’ve been in the web development game long enough to remember the days when you’d have to download zip files and manually put them in a /scripts directory — tools like NPM have made it far easier to manage your dependencies, and it’s easy to think that the tried-and-true tools are “good enough."
However, even if you have a sane build process that concatenates all of your files in production, you probably still have an index.html file somewhere in your application that looks something like this:
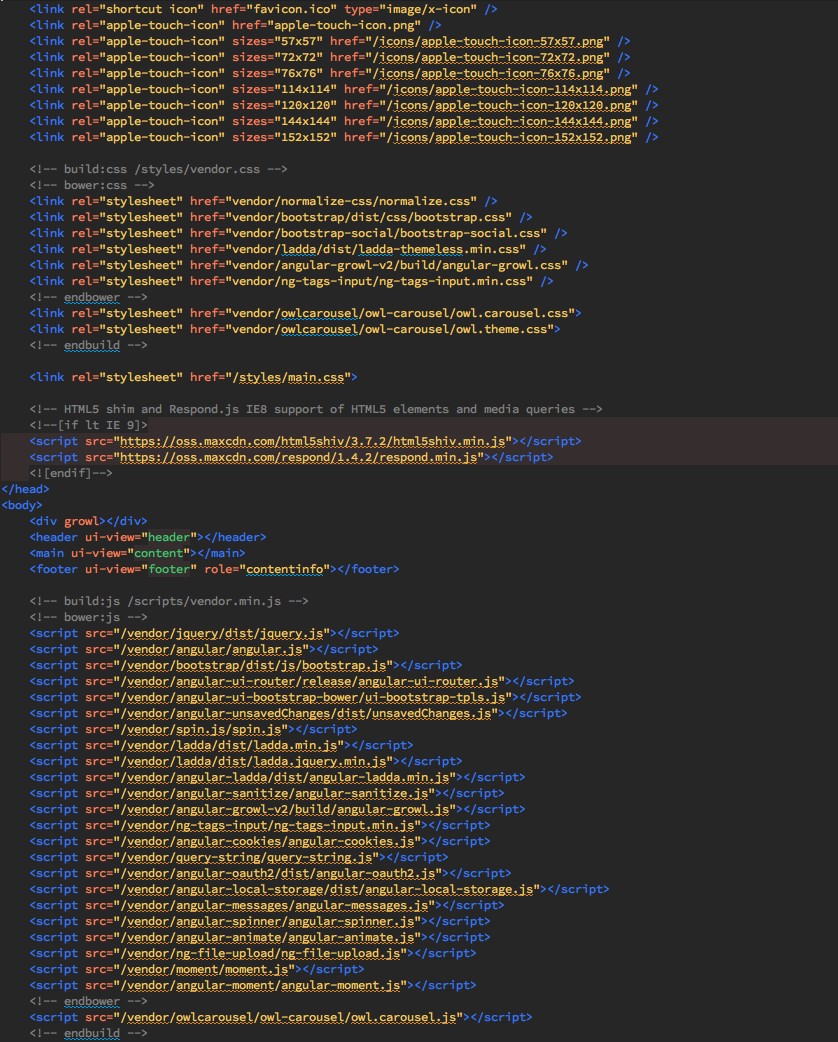
Yikes.
There are several problems with this approach (and if you’ve built a single-page application of any complexity, you’ve probably run into issues with them):
- Error messages generally are less helpful when you’re dealing with concatenated, minified files
- You have to spend time worrying about the order in which you’re loading your script files
- Dependency injection becomes more complicated on minified files — for example, Angular’s
$scopeis no longer$scopewhen minified, but might be something likea. You must remember to manually identify your dependencies as strings. - Grunt and Gulp still require a fair amount of manual configuration and boilerplate
And, most importantly:
- Even minified and concatenated, if you have a large number of application files and/or dependencies, you’re pulling in fairly large CSS and JS files. The browser must make requests to get all of these.
How Webpack is different
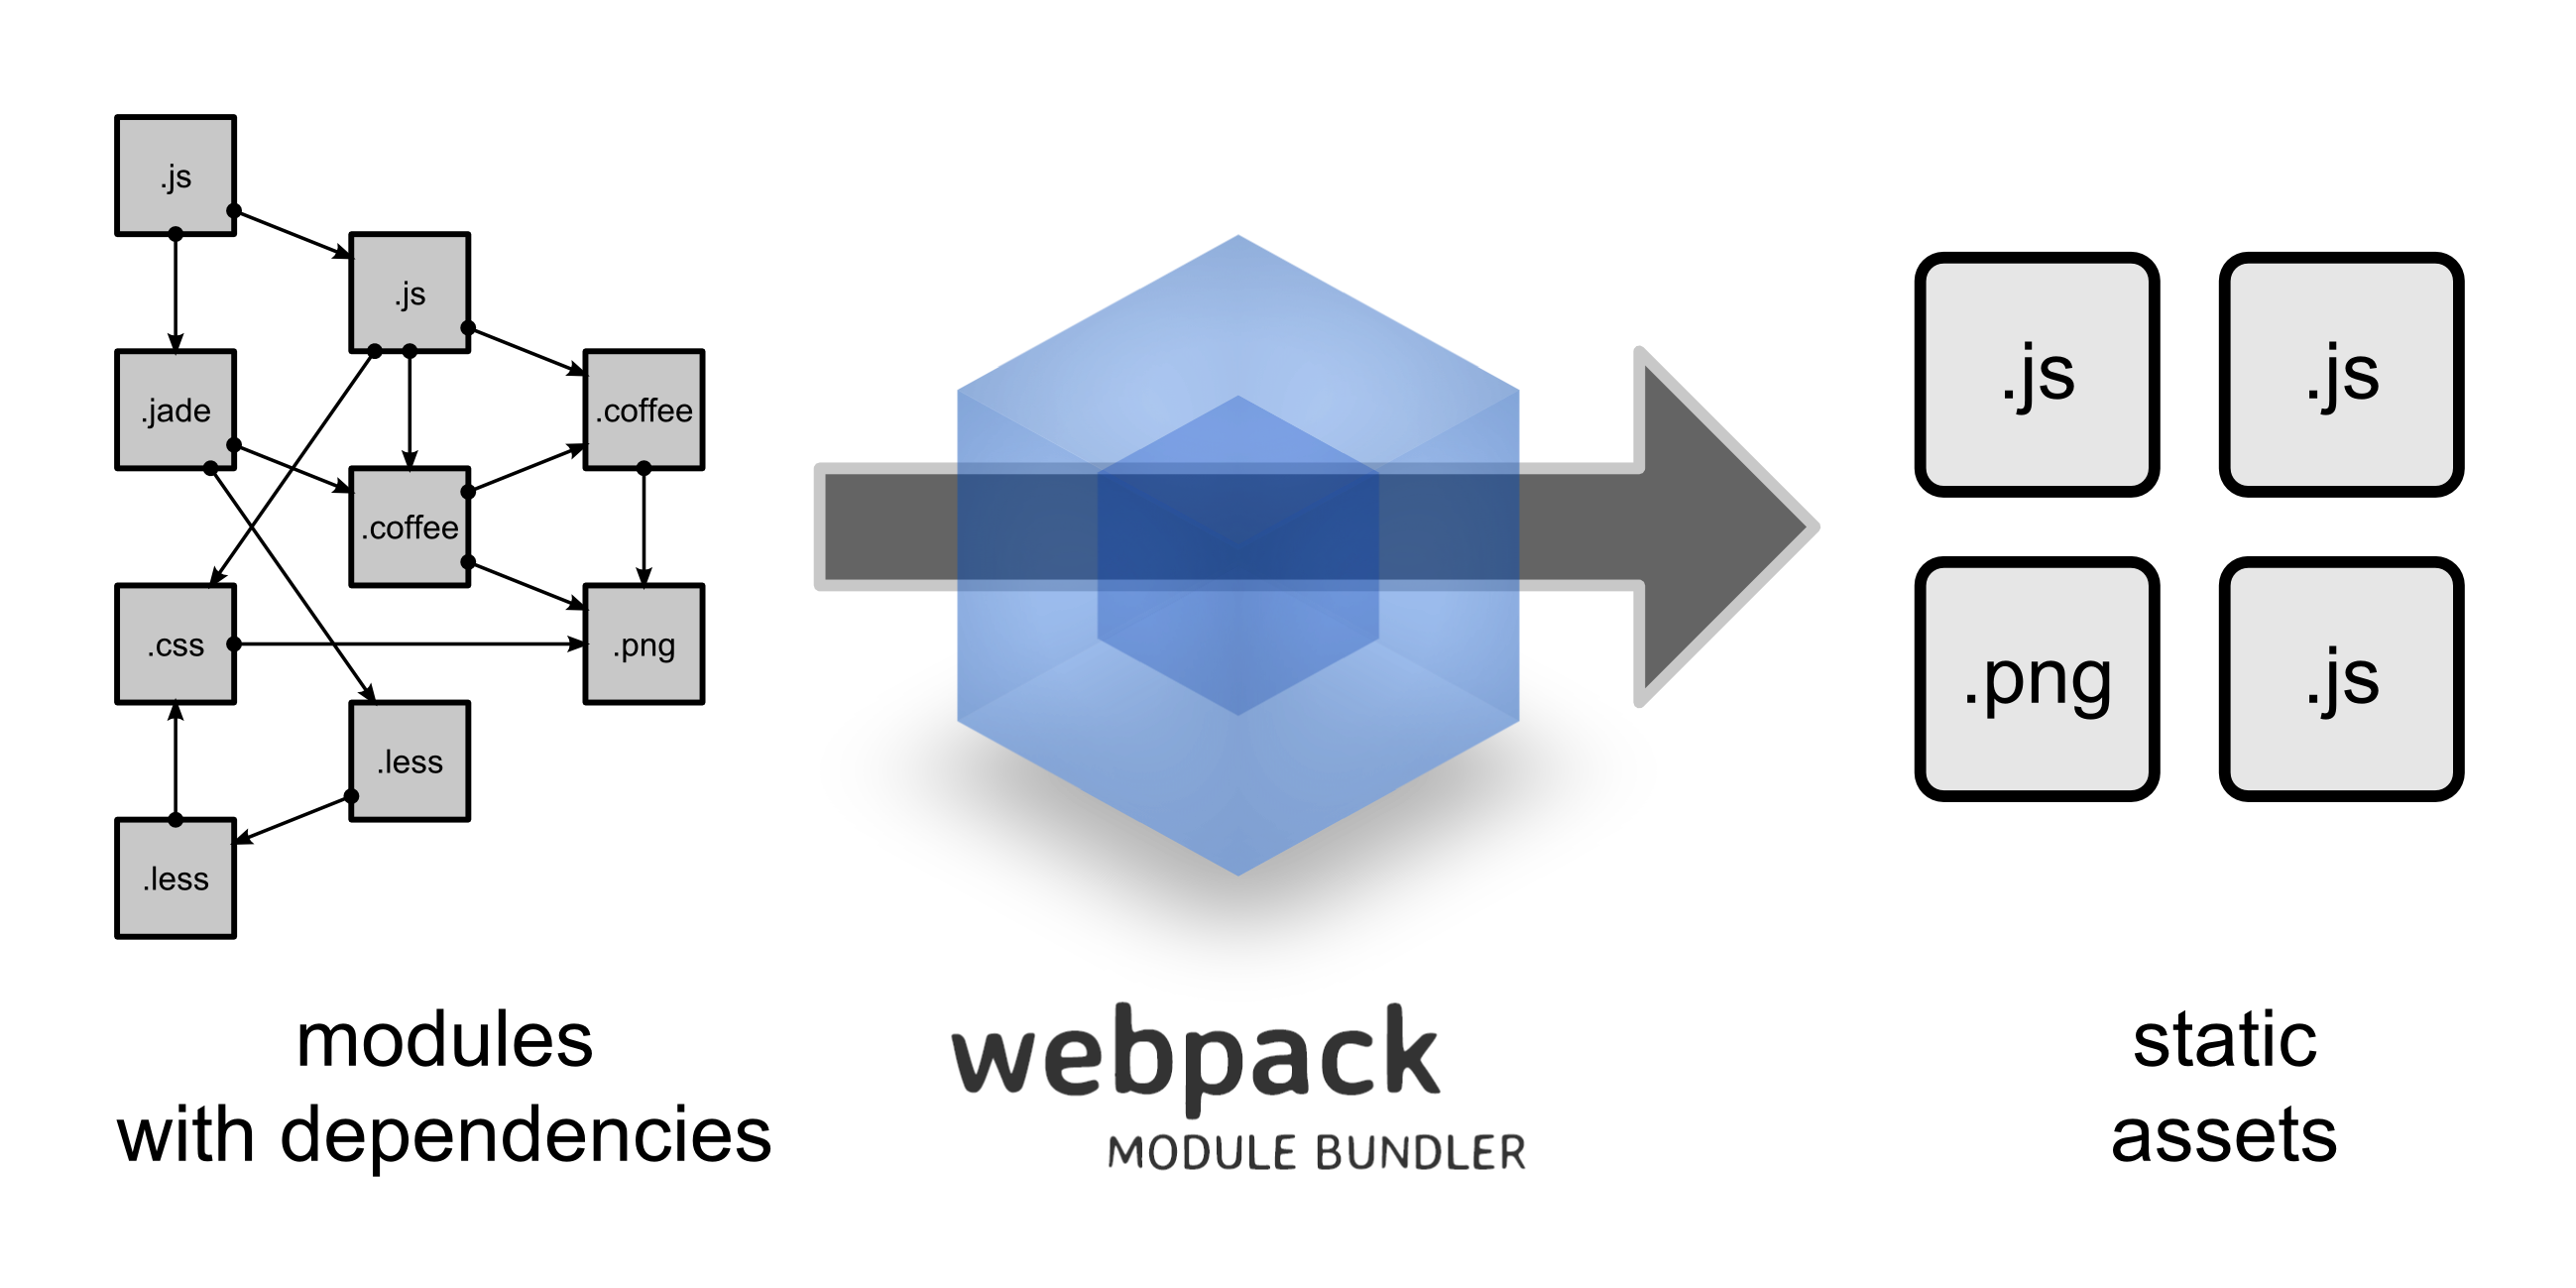
Webpack is a module bundler — a build tool, not a task runner. Instead of following a list of tasks like Grunt or Gulp, Webpack analyzes your dependencies tree and bundles your assets (JavaScript files, CSS, Sass, HTML, etc.) into a smaller subset of files.
“Wait,” you’re probably saying. “This sounds a lot like what Gulp already does for me."
Code Splitting
The difference is that, with Gulp, you’re bundling all of your assets into a few files — perhaps vendor.js, app.js, app.css — and then including them on every page, whether those assets are needed or not. Webpack, on the other hand, is smart enough to keep track of dependency trees for you and serve only those assets to the parts of your application that need them.
It does this by walking through the require statements of your project (for CommonJS and AMD) or import statements (for ES6 modules with a transpiler such as Babel), splitting the code into self-contained chunks, and then serving them on demand.
In short, if you have multiple pages in your single-page application, you can set Webpack up to only download code for each individual page. There is no need to re-download common modules.
Hot Module Replacement
If you’ve used a task runner before, you may be familiar with LiveReload — it listens for changes to your files and then tells the browser to reload itself when a change happens.
Webpack’s Hot Module Replacement (HMR) feature takes this a step further. Webpack will also watch for changes to your files, but instead of refreshing the browser to apply changes, it swaps out only the changed modules and updates your code in-place.
Why exactly is this so cool? If you were doing something requiring the UI to be in a certain state — such as filling out a form or looking at a dropdown menu — you will not have to waste time putting the UI back into that state after a full browser refresh.
Other cool stuff
Webpack (along with its rich plugins library) makes it relatively easy to do some other neat things as well:
- Hashing files for cache busting
- Injecting CSS and images into your presentation layer on an as-needed basis (and if that sounds gross, we'll talk more later about why you might want to do this)
- Run a small Express dev server to serve your code and, optionally, proxy back-end requests to a separate server
- Auto-generating HTML5 files that include your webpack bundles — very useful if you're using a library like React and including your HTML and CSS in JavaScript files
Tutorial
Let’s put together a simple application to demonstrate how Webpack works. To follow along, make sure you're running a relatively new version of Node - 0.12 at minimum, but I recommend you get the latest (5.5.0 at the time of this post.)
This app's functionality is incredibly simple — all it does is takes a JavaScript object containing a list of party guests and then displays only their names on a page. Instead of writing HTML to display the names, we will write vanilla JavaScript to insert them directly into the DOM, similar to what we might do in a framework like React or Vue.js.
Building the Old Way
First, we'll take a look at how we would build something like this without Webpack.
Let's create a folder to hold our code and a default package.json file:
$ mkdir unpacking-webpack$ cd unpacking-webpack$ npm init -yAnd then we'll create our three JavaScript files within a src directory:
guestList.js is a simple JavaScript object containing the name, phone number, and email of our three party guests. In a larger application, a list like this would likely be served from an API, but we'll hard-code the JSON here:
src/guestList.js
var GuestList = [ { "name": "John Doe", "phone": "111-222-3333", "email": "johndoe@aol.com" }, { "name": "Jane Smith", "phone": "444-555-6666", "email": "janesmith@hotmail.com" }, { "name": "Bob Miller", "phone": "777-888-9999", "email": "bobmiller@gmail.com" }];showGuestNames.js takes that list of guests, removes potentially sensitive info, and inserts their names directly into the DOM:
src/showGuestNames.js
var ShowGuestNames = function() { var ul = document.createElement('ul'); GuestList.map(function(guest) { var name = document.createTextNode(guest.name); var li = document.createElement('li'); li.appendChild(name); ul.appendChild(li); }); document.getElementById('list').appendChild(ul);};And index.js contains an immediately-invoked function that calls the GuestNames() function from showGuestNames.js, inserting the guest names into the DOM:
src/index.js
(function() { ShowGuestNames();})();For fun, let's add a style.css file into the mix as well.
src/style.css
li { color: red;}Finally, you'll want to create an index.html page at the root of our application and create an empty div for the list. Additionally, you'll want to add add script tags for all of our JavaScript files and pull in the CSS file we created:
index.html
<!doctype html><html lang="en"><head> <meta charset="UTF-8"> <title>Unpacking Webpack</title> <link rel="stylesheet" href="src/style.css"></head><body> <div id="list"></div> <script src="src/guestList.js"></script> <script src="src/showGuestNames.js"></script> <script src="src/index.js"></script></body></html>Your directory structure should now look like this:
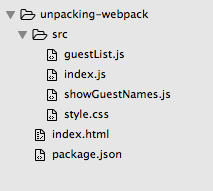
You should then see something like this in the browser:

Simple enough, right? A lot of newer libraries work like just this by inserting HTML into your JS instead of the other way around (albeit in a much cleaner and more powerful way, of course.)
Adding Webpack
Now let's look at how we would bundle these files using Webpack.
First, let's install Webpack through NPM:
$ npm install --save-dev webpack
Next, we will need to add a webpack.config.js file at the root of our project:
webpack.config.js
const path = require('path'); const PATHS = { src: path.join(__dirname, 'src'), dist: path.join(__dirname, 'dist')}; module.exports = { entry: PATHS.src, output: { path: PATHS.dist, filename: 'bundle.js' }};entry tells Webpack where the top of your dependency tree is -- it will start at index.js and work its way through all your dependency files to build your output, specified here as bundle.js in the dist directory. To see how this works, run $ node_modules/.bin/webpack in your console. You should see output that looks something like this:
Hash: 615239b981b68e935cb1Version: webpack 1.12.12Time: 69ms Asset Size Chunks Chunk Namesbundle.js 1.44 kB 0 [emitted] main [0] ./index.js 51 bytes {0} [built]You should also see bundle.js in a newly-created dist directory. Let's go ahead and replace the references to our Javascript /src files with our new bundle.js:
index.html
...<body> <div id="list"></div> <script src="dist/bundle.js"></script></body></html>When you refresh the page in the browser, though, our list of guests is gone! If you look at Webpack's output, you can see that it only processed our index.js file, and the last few lines of bundle.js confirm this:
/******/ (function(modules) { // webpackBootstrap ... /* 0 *//***/ function(module, exports) { (function() { ShowGuestNames(); })(); /***/ }/******/ ]);So how do we get our showGuestNames.js and guestList.js files included in the bundle so our names show up again? We need to use a JavaScript module format such as CommonJS, AMD, or ES6.
While ES6 isn't 100% natively supported yet by Webpack or any of the major browsers, Webpack makes transpiling it back down to ES5 fairly easy with a tool called Babel. However, to keep things simple, we're going to use CommonJS in this example.
If you're not familiar with CommonJS, it allows you to add an
exportsproperty to plain JavaScript objects (known as modules). This allows you torequirethis object within other JavaScript files and, in turn, lets tools like Webpack know that they should be bundled together.
Our guestList.js file originally looked like this:
src/guestList.js
var GuestList = [ { "name": "John Doe", "phone": "111-222-3333", "email": "johndoe@aol.com" }, { "name": "Jane Smith", "phone": "444-555-6666", "email": "janesmith@hotmail.com" }, { "name": "Bob Miller", "phone": "777-888-9999", "email": "bobmiller@gmail.com" }];But written as a CommonJS-style module, it would look like this:
module.exports = [ { "name": "John Doe", "phone": "111-222-3333", "email": "johndoe@aol.com" }, { "name": "Jane Smith", "phone": "444-555-6666", "email": "janesmith@hotmail.com" }, { "name": "Bob Miller", "phone": "777-888-9999", "email": "bobmiller@gmail.com" }];This would allow our showGuestNames.js to require this file, import it as a variable, and use it with very little change to the code:
src/showGuestNames.js
var GuestList = require('./guestList.js'); module.exports = function() { var ul = document.createElement('ul'); GuestList.map(function(guest) { var name = document.createTextNode(guest.name); var li = document.createElement('li'); li.appendChild(name); ul.appendChild(li); }); document.getElementById('list').appendChild(ul);};And then we can require our showGuestNames.js file in index.js:
src/index.js
var ShowGuestNames = require('./showGuestNames.js'); ShowGuestNames();Let's do one more small tweak. Running node_modules/.bin/webpack is a bit unwieldy, but we can easily add a script to our package.json file to make it easier:
"scripts": { "build": "webpack"},Now, if we run npm run build, we should see that Webpack is now picking up our extra files and bundling them together:
Hash: 63ead9eb190893dbacd4Version: webpack 1.12.12Time: 84msAsset Size Chunks Chunk Namesbundle.js 2.43 kB 0 [emitted] main [0] ./src/index.js 72 bytes {0} [built] [1] ./src/showGuestNames.js 378 bytes {0} [built] [2] ./src/guestList.js 425 bytes {0} [built]And if we view our code in the browser, we can see our list of names once again.
Loaders
In order to fully understand the power of Webpack, you need to understand the concept of 'loaders.' They function much the same way as Grunt or Gulp tasks — you can use them to do things such as transpile CoffeeScript or ES6 down to JavaScript that browsers actually understand, inline images as URLs, or require / import CSS directly into your JavaScript files.
We're going to use the last thing on that list as an example and pull the style.css file we created earlier into our bundle.js.
"But wait," you might be saying. "Why would I want to do something disgusting like pull my CSS into my JavaScript files? Don't I want to separate my concerns?"
That's the beauty of writing modular views in JavaScript. Because you're managing dependencies on a per-component basis, you're only pulling in what you need instead of managing some sort of main app.scss manifest that lists every file you've created. If you're already using a methodology like BEM, SMACSS, or SUIT, this is a logical next step (and if you haven't heard of any of the style approaches I just listed, I highly recommend you look into them!)
Ultimately, you are separating your concerns. Instead of keeing your HTML, CSS, and JavaScript as separate as possible, the goal is to break your app into small, modular components and keep those as separate as possible. It's a different way of writing code, but it can definitely make large applications easier to manage.
Pulling in our CSS is as easy as installing the loaders from NPM:
$ npm install --save-dev style-loader css-loader
And adding a few lines to our Webpack config file:
webpack.config.js
module.exports = { entry: PATHS.src, output: { path: PATHS.dist, filename: 'bundle.js' }, module: { loaders: [ { test: /\.css$/, loader: 'style!css' } ] }};All loaders require at least two properties. The first is test, which specifies a Regex that tells Webpack what sort of file to look for. Here, we are looking for CSS, but seeing something like test: /\.scss$/ for Sass or test: /\.(js|jsx)$/ for JavaScript is common as well. The second required property is loader, which is just a string of loaders (usually pulled in as NPM packages) separated by !.
You can also add an exclude property to your loader object, which will tell the Regex to ignore certain files -- such as anything contained within your node_modules folder.
We'll also want to reference our CSS file in our showGuestNames.js file so that Webpack knows to pull it in as a dependency:
showGuestNames.js
require('./style.css');
If we run npm run build and remove the reference to our stylesheet from our index.html file, our list should have the red color applied to it once again.
Conclusion
Task runners like Gulp and Grunt can still have their place in a developer's toolbelt, and for some projects, the overhead of a complex Webpack setup might not be worth the payoff when tools like Elixir make Gulp configuration a snap. However, even though there can be a bit of a learning curve on more involved setups, the power and flexibility can absolutely be worth the time investment, especially if you're using a newer framework like React.
Interested in a deep-dive into any particular features of Webpack? Let us know on Twitter!
Get our latest insights
in your inbox:
in your inbox:
Hey,
let’s talk.
let’s talk.